Natural Dyeing Workshop ~
I did this workshop, after doing the Batik one. I mainly chose to do it for contrast at the time, because this method of dyeing uses a lot more natural products. Where basically all the dyes and fixatives for Batik were not natural. I also think it’s more interesting using products from nature as dyes, because it suggests the idea that it’s something you can do in your own back yard/kitchen. Instead of going to a special workshop equipped for it, or buying lots of products.

The cotton we used for this was a lot more rough in its texture, it was also a lot thicker. I quite liked it, but its more limited in its uses. The cotton had been locally woven by hand and created on their traditional looms.
I decided to dye my whole piece of fabric black, and then do white designs on it.

The main dye for this workshop what we used, was made by leaves being left to soak in big tubs of water. The first thing that we did was to strain the leaves out of the water, pouring it through sieves.

The tree where the leaves came from. (Sadly the people teaching us only knew the name of the tree in their local language.)

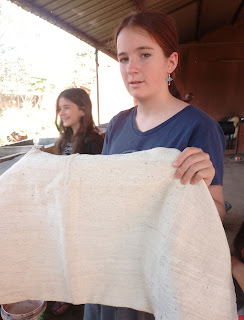
Giving the material its first soaking.

Spreading it out to dry.

The next dye we used was naturally occurring black clay harvested from a river bank, stored in tubs and then poured out and mixed with water when its going to be used. It was quite smelly!
We then repeated the process of rinsing it in the leaf mix, and spreading it out to dry.

Drying.

After one soaking in the clay (we left it to dry overnight.)
We then soaked it the black clay mixture one more time.

This was another fixative we used. Again sadly I do not know what the stalks are called. After being rubbed together, and then mixed with water; these stalks produced a reddish colour. The material was soaked in this, and then spread out to dry again!
Now the fabric is ready for the next stage – the designs. I chose some stencils (which had all been hand cut, by the guy helping us). The next stage was to mix the colour for the patterns.

The substance we used for the designs, sadly broke the patter on natural substances!
It was a mixture of bleach, water, and washing powder! We were given little scrubbing brushes to apply the colour. First you laid down the stencil, got some of the white on your brush and used just like if you were painting using a stencil.

The border of my pattern.


Finally, when finished brushing on your pattern, just leave it to dry; and you will have the finished result!


Some beautiful examples of dyed pieces for sale in the shop.
The local people use these dyed cloths for various different purposes. The symbols on the them, can either be decorative or they have cultural meanings, or sometimes both. They are used as coverings, wall hangings or even as rugs/mats. You’ll see many of them are geometric. Cowrie shells also have a big part in african cultural history, which I used for my border. They tell me that they are symbols of wealth, fertility and prosperity. People also beliove they are good luck and keep bad stuff away. They are often in jewellery too.
I really liked my final piece, that this workshop produced. And i enjoyed doing it for the most part, the process was still quite lengthy however. With lots of drying, and waiting between steps. My favourite part was brushing on the patterns at the end, I liked using the stencils. I also liked the natural colour tones, they’re more similar to actual colours in nature. It was interesting learning about the different dyes, and fixatives used. Whilst I like the idea of dyeing at home, the dyes we used here were not really practical, or accessible for us at home. I would still like to try dyeing at home using natural products that are available (like using beetroot, and spinach to dye things).
Leave a Reply